Don’t use an accounting system that integrates with CollBox?
If you don't use one of the accounting systems we integrate with, or you just don't feel like connecting your books, you can still use CollBox to collect on past-due accounts by importing them through our spreadsheet template process.
Below, we'll walk you through the entire process from start to finish. But first, a quick summary of the steps:
- After logging in to CollBox, head over to Settings > Integrations > Import Manual Data and click on the "Open Spreadsheet Importer" button
- Once you click the "Open Spreadsheet Importer" button, you'll see instructions for downloading, completing our spreadsheet template, and uploading it when you're finished
- Download the spreadsheet template and fill it out according to the examples
- Note: For each invoice a client owes, you'll need to create a new row in the spreadsheet but you can copy/paste the contact info to subsequent rows
- Note: If it's a Commercial (B2B) debt, we'll need the "Company Name" cell filled out. If it's a Consumer (B2C) debt, you can leave it blank
- Once filled out, upload the spreadsheet on the same page and we'll get it loaded to your CollBox account right away and notify you when it's ready
- From there, head to the "Past Due" section to review and submit the accounts for collections
- After submitting them, we'll briefly hold them so you can provide supporting documentation (invoices, contracts, etc.) for reach account using the "Attach File" button on the placement summary screen
- Note: We won't release the placement of debt until you've provided at least one of the above items for each invoice on each account you've submitted
- Once you've uploaded the required documentation, we'll automatically release the placement(s) of debt and one of the agencies in our network will get to work right away!
For a more detailed walkthrough of the process, check out the steps below with screenshots and additional instructions.
Detailed Walkthrough
First, head over to the "Settings" section of the app and click on "Integrations" then click "Import Manual Data".
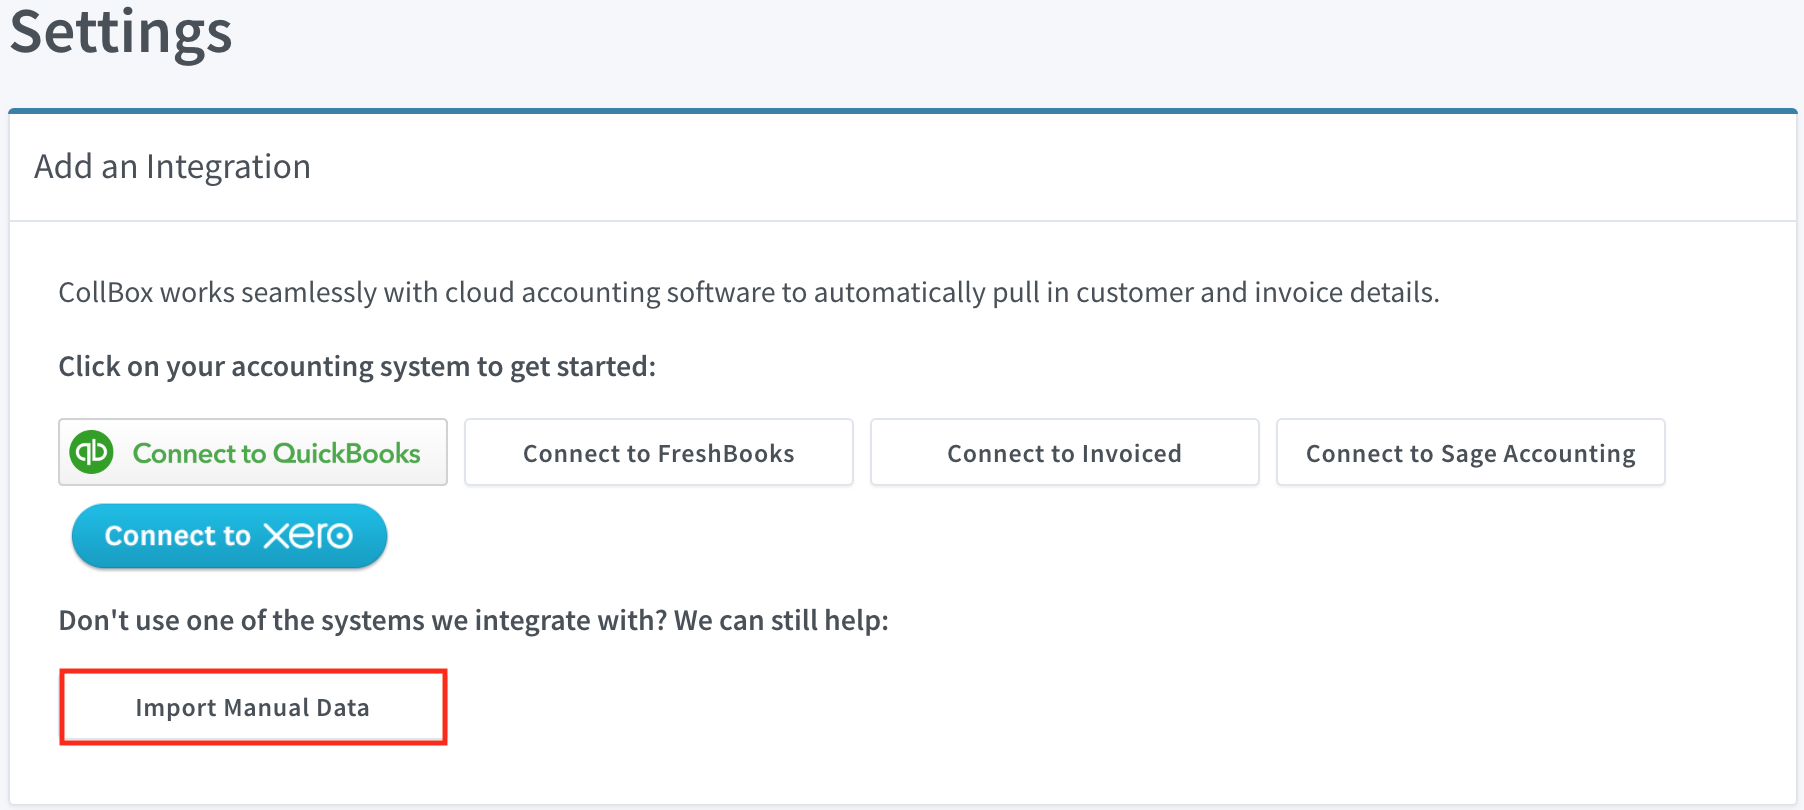
Once on the "Import Manual Data" page, click the “Open Spreadsheet Importer” button.
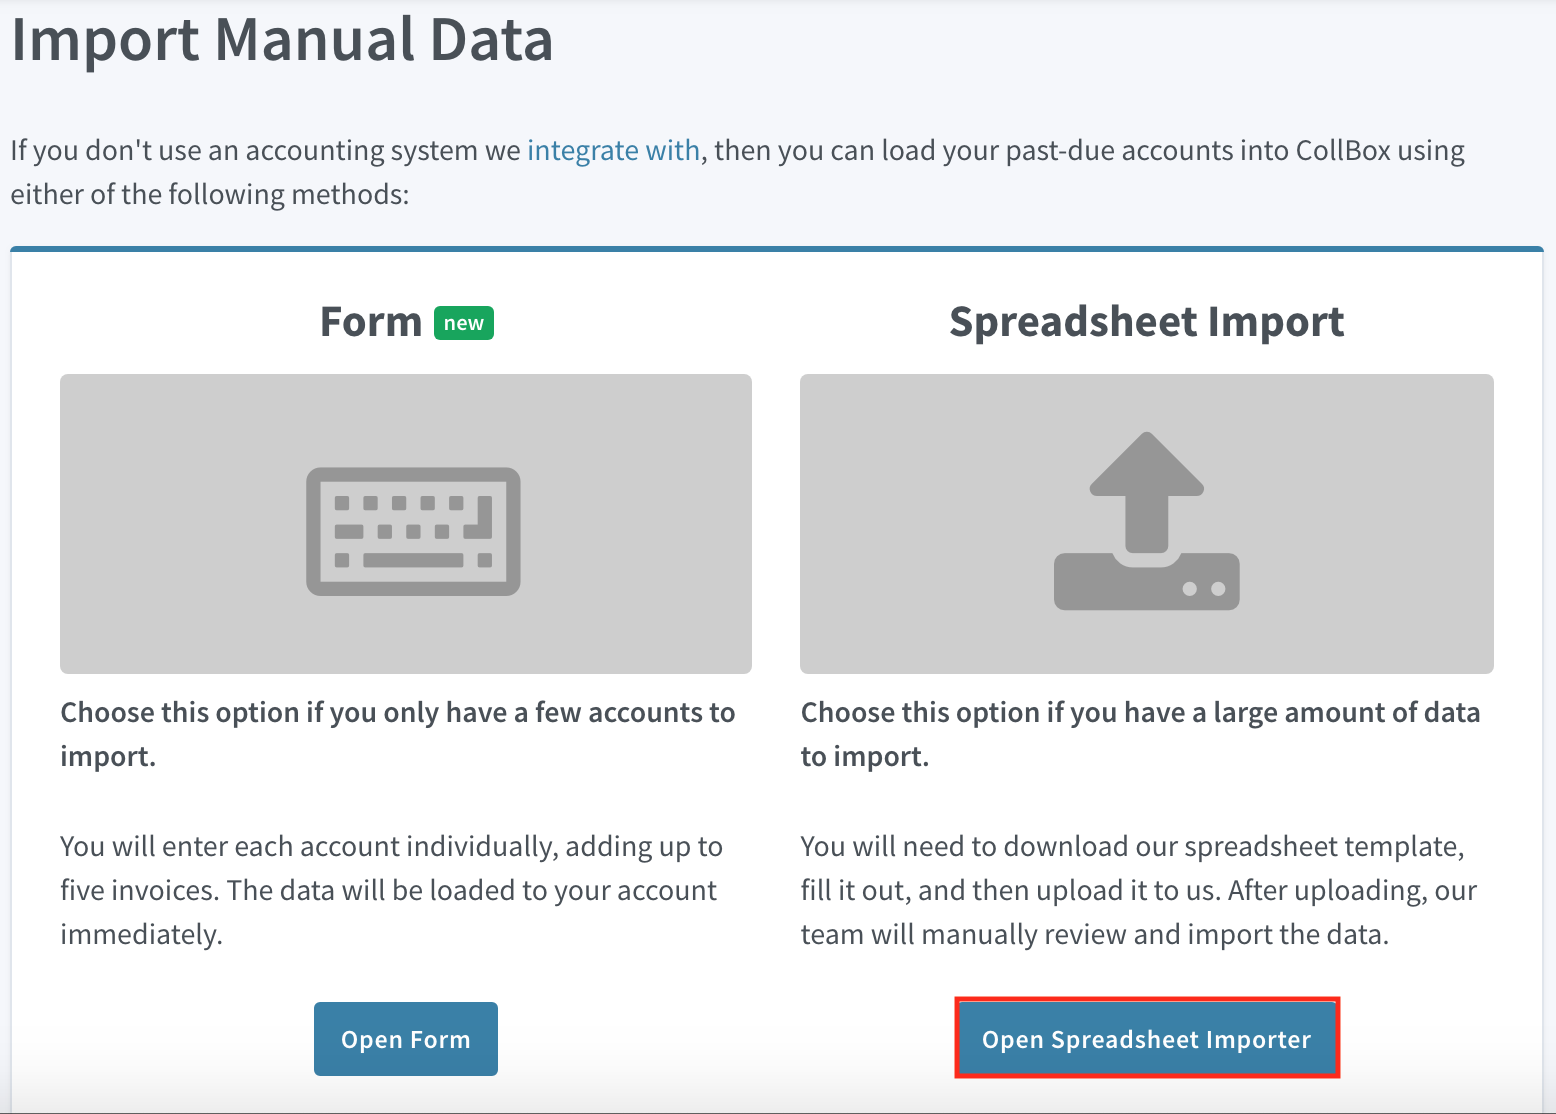
On the next screen, you'll see instructions for downloading our template and how to upload it to us once you've finished filling it out.
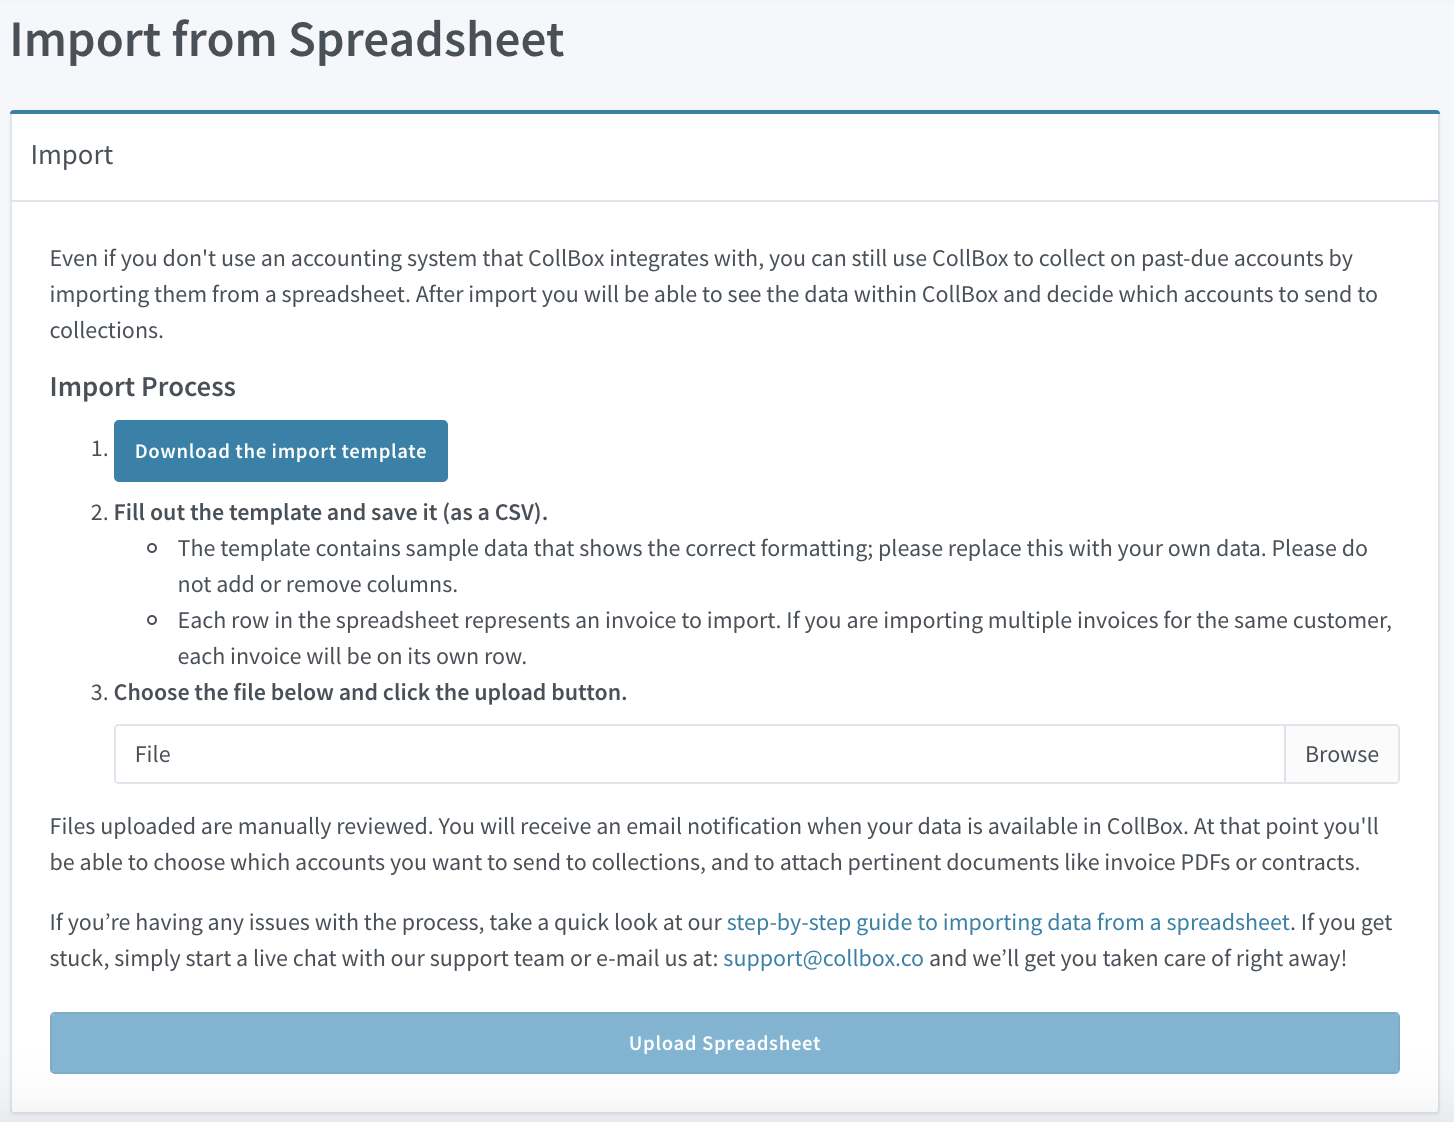
After downloading the import template, fill out the fields with the information you have about the account you would like to get paid for, following the format shown for the example accounts in the spreadsheet. Each row in the spreadsheet represents an individual invoice to import. If you are importing multiple invoices for the same customer, each invoice will be on its own row and you can simply copy/paste the relevant contact details to the subsequent rows as seen in the image below. It's okay to add multiple clients/debtors to the spreadsheet as shown in the example below. You do not need to upload multiple spreadsheets if you have multiple clients/debtors you'd like to import.