If you don't use one of the accounting systems we integrate with, or you just don't feel like connecting your books, you can still use CollBox to collect on past-due accounts by importing them through our form importer.
Below, we'll walk you through the entire process from start to finish. But first, a quick summary of the steps:
<aside> 📌 1. After logging in to CollBox, head over to Settings > Integrations and click on the Import Manual Data button 2. On the next screen, you'll be given the option to import via Form or Spreadsheet Import. Select Open Form 3. You'll be taken directly to the Form and prompted to answer whether the debtor is an individual or company 4. After selecting the Debtor Type, hit Next Page and you'll be taken to the next page where you'll fill out the debtor's contact information (Name, Phone Number, and Address are all required) 5. Hit Next Page again and you'll be taken to the Invoice(s) page. You can fill out up to 5 invoices for one debtor at a time (all Invoice information is required) 6. Once you're done filling out invoice information, hit Submit and you'll be taken back to your CollBox Dashboard where you'll see your newly imported data 7. From there, head to the Past Due section to review and submit the account for collections 8. After submitting the account, we'll briefly hold them so you can provide supporting documentation (invoices, contracts, etc.) for each account using the Attach File button on the placement summary screen Note: We won't release the placement of debt until you've provided at least one of the above items for each invoice on each account you've submitted 9. Once you've uploaded the required documentation, we'll automatically release the placement(s) of debt and one of the agencies in our network will get to work right away!
</aside>
For a more detailed walkthrough of the process, check out the steps below with screenshots and additional instructions.
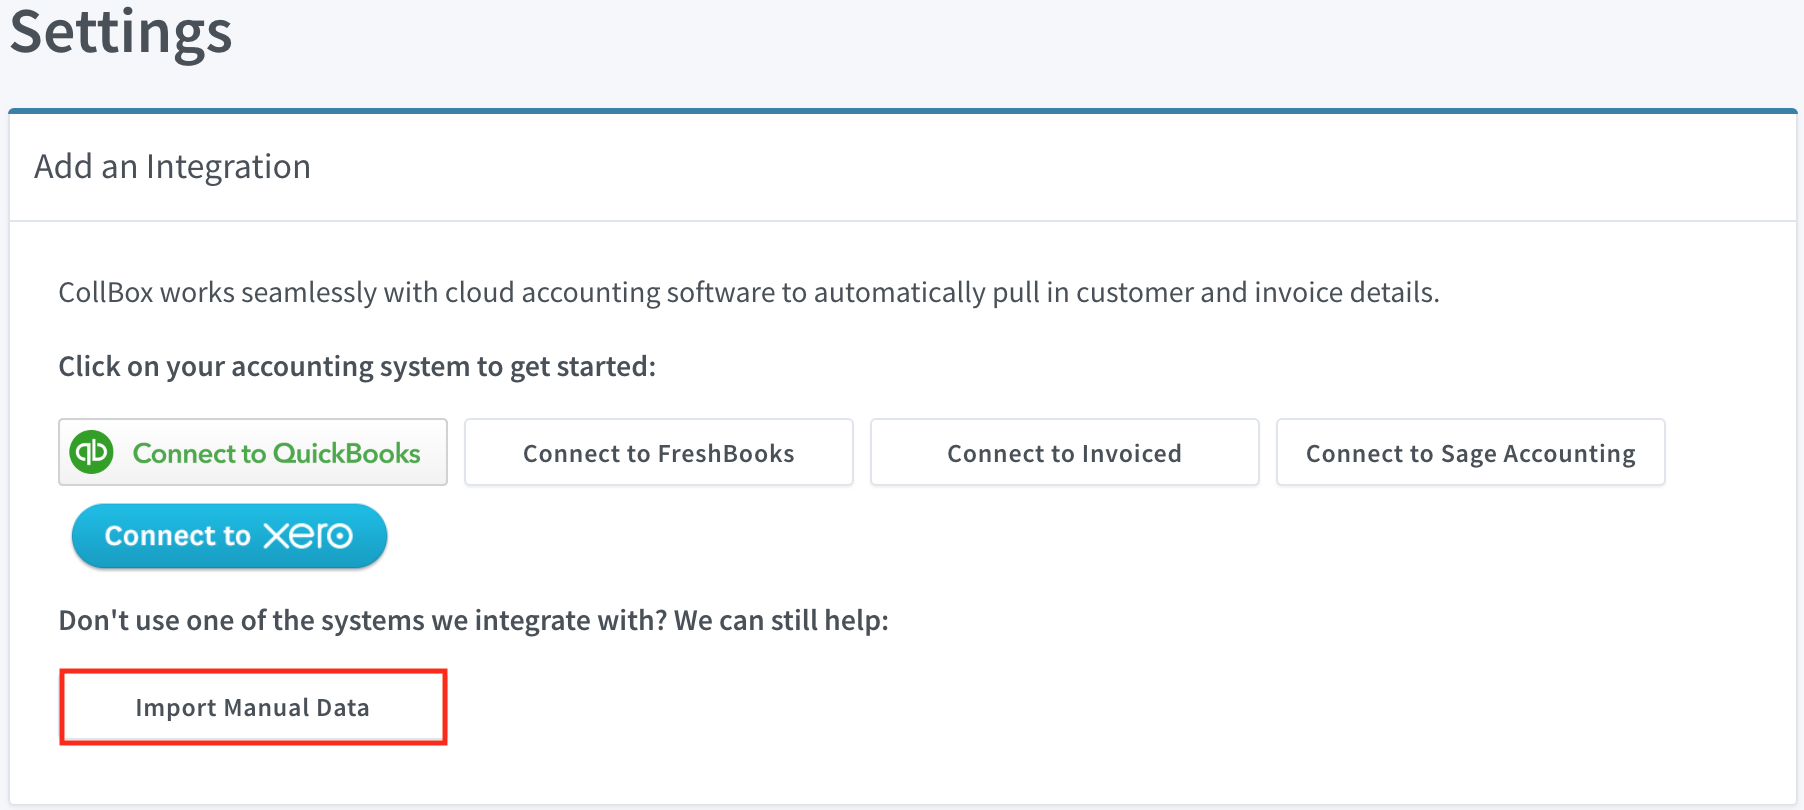
First, head over to the Settings section of the app and click on Integrations then click the Import Manual Data button.
On the next screen, you'll be given the option to import your data via Form or Spreadsheet Import.
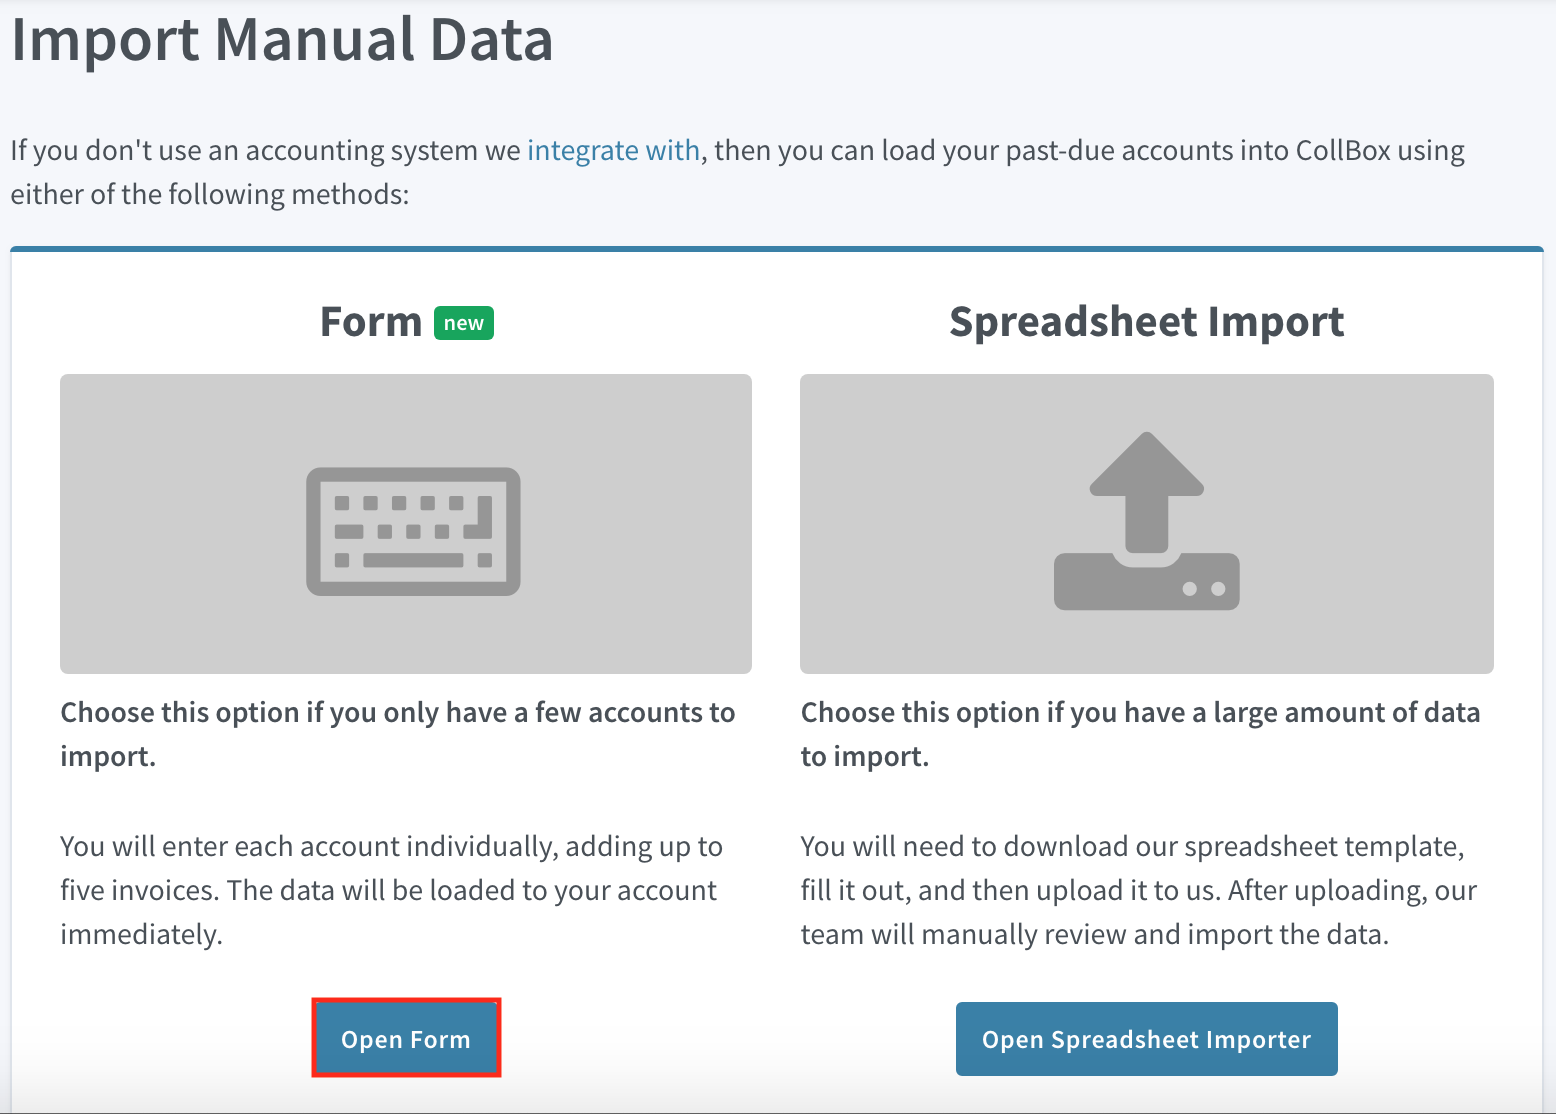
Click Open Form and you'll be directed to the webpage where you'll be prompted to answer whether the debtor is a Company or an Individual.
<aside> 💡 Tip: Company - B2B/owed by a business; Individual - B2C/owed by an individual
</aside>
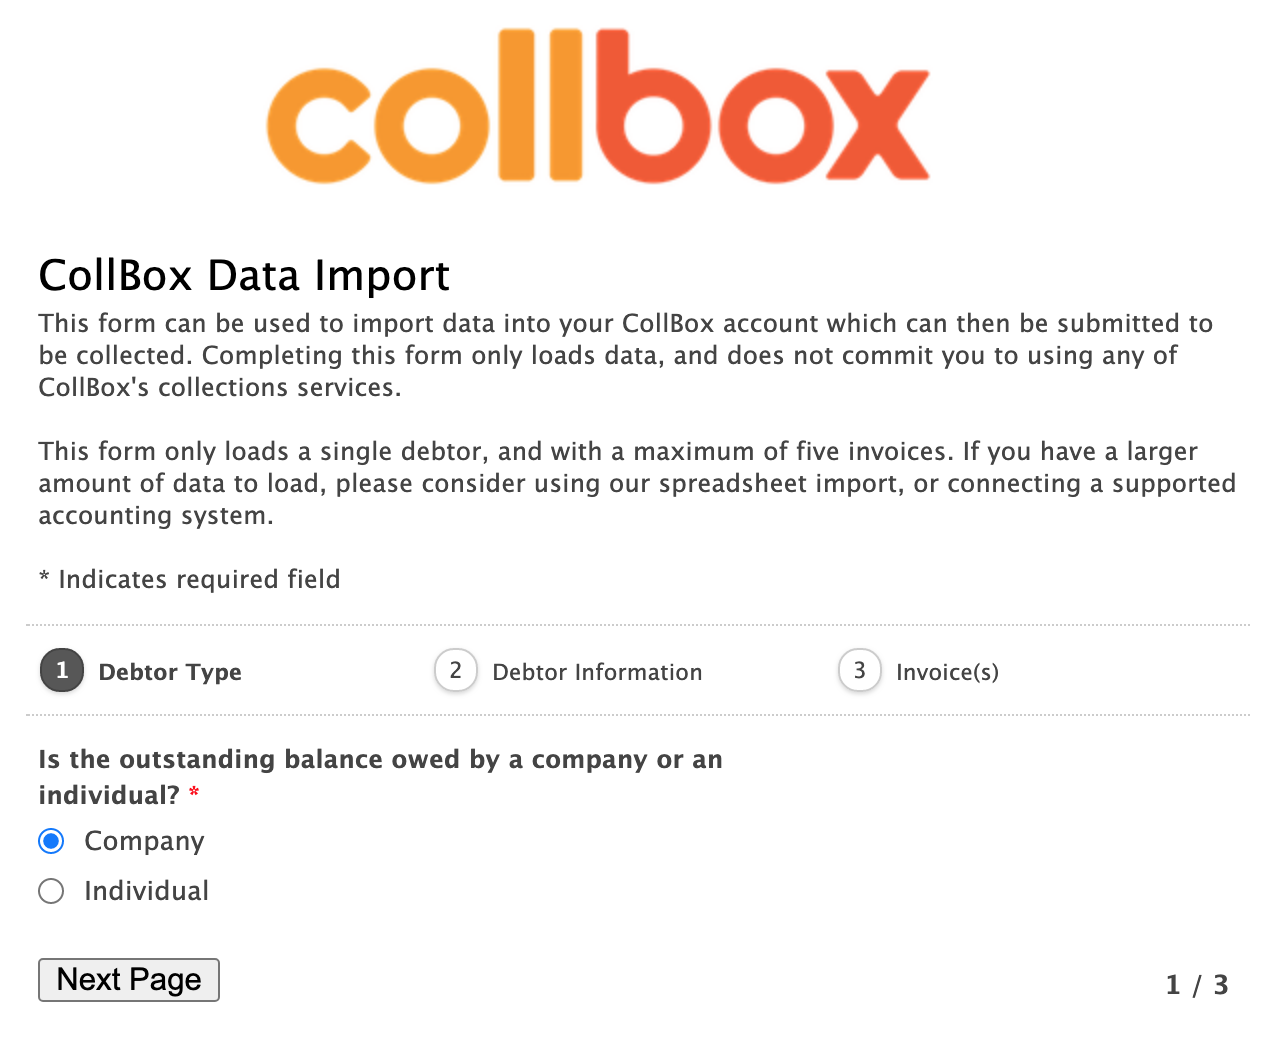
Once you've selected your Debtor Type, hit Next Page, taking you to the Debtor Information page. Fill out the debtor's contact information then hit Next Page.